Table of Contents
- Introduction
- Assessing the current plumbing system and identifying issues
- Choosing appropriate materials for repiping
- Planning the layout and design of the new plumbing system
- Shutting off the water supply and draining the system
- Removing old pipes and fixtures
- Installing new plumbing pipes and fixtures
- Conducting inspections and testing the new system for leaks
- Finalizing the installation and restoring the water supply
- Conclusion
- Frequently Asked Questions
Introduction
Are you tired of dealing with leaky faucets, low water pressure, and outdated piping systems?
Welcome to the world of repiping—a transformative solution that can breathe new life into your home’s plumbing.
Repiping not only eliminates pesky plumbing problems but also enhances your home’s value and efficiency.
In this comprehensive guide, we’ll take you through the step-by-step process of repiping your home, unveiling modern plumbing solutions designed to withstand the test of time.
Imagine enjoying clean, reliable water flow with cutting-edge materials that ensure optimal performance, all while reducing water waste.
Whether you’re considering a full repipe or just addressing specific issues, this guide will empower you with the knowledge to make informed decisions.
Get ready to roll up your sleeves as we dive into the essentials of repiping your home, making it a sanctuary of comfort and convenience.

Assessing the current plumbing system and identifying issues
Assessing the current plumbing system is a critical first step in the repiping process. This involves a thorough inspection of the existing pipes, fixtures, and connections throughout the house. Homeowners or professional plumbers should look for signs of leaks, corrosion, and wear. Additionally, checking the water pressure can provide clues about underlying issues. A drop in pressure might indicate a blockage, while unusually high pressure can strain the plumbing system and lead to future problems.
It’s also important to identify the type of materials currently used in the plumbing system. Older homes may still have galvanized steel or copper pipes, which can corrode over time. These materials can pose various issues, including discolored water and restricted flow. Understanding these factors will help prioritize the areas that need immediate attention. Once the assessment is complete, a comprehensive plan can be developed, focusing on the most critical repairs and replacements needed to ensure a reliable and efficient plumbing system.
Choosing appropriate materials for repiping
Choosing appropriate materials for repiping is a crucial step in ensuring the long-term functionality and safety of a home’s plumbing system. Common materials used in repiping include copper, PEX, and CPVC, each with its own benefits and drawbacks.
Copper is a durable and long-lasting option, resistant to corrosion and capable of handling high temperatures. However, it can be more expensive and may require specialized skills for installation. Alternatively, PEX (cross-linked polyethylene) is gaining popularity due to its flexibility, lower cost, and ease of installation, making it particularly suitable for retrofitting existing homes. PEX is also resistant to scale and chlorine and does not corrode.
CPVC (chlorinated polyvinyl chloride) is another option that offers resistance to corrosion and is cost-effective, but it may not be suitable for high-temperature applications. Homeowners should consider factors such as local building codes, water quality, and budget when selecting the right materials for their repiping project, as choosing the appropriate material can significantly impact the longevity and performance of the plumbing system.
Planning the layout and design of the new plumbing system
Planning the layout and design of a new plumbing system is a crucial step in the repiping process. This involves assessing the existing plumbing configuration and determining the most efficient way to install new pipes. Start by creating a comprehensive blueprint that outlines the placement of pipes, fixtures, and appliances. Consider the material of the new pipes, typically copper, PEX, or CPVC, as each has its benefits and drawbacks.
Ensure that the design allows for optimal water flow and drainage, minimizing the chances of clogs. Additionally, account for local building codes and regulations, which may dictate specific requirements for plumbing design. It is also wise to consider future needs, such as additional bathrooms or appliances that may require access to the plumbing system. Proper insulation and protection against potential freezing in colder climates should also be factored into the design. Finally, collaborate with a professional plumber to refine your plans; their expertise can help identify potential issues and opportunities for improvement.
Shutting off the water supply and draining the system
Before beginning the repiping process, it is essential to shut off the water supply to prevent any leaks or flooding. This step involves locating the main water shutoff valve, which is typically found near where the water line enters the home. Turning this valve clockwise will stop the flow of water throughout the entire system.
Once the water supply is off, the next step is to drain the plumbing system. This is crucial to avoid any residual water from interfering with the repiping process. Start by opening all the faucets in the house, including sinks, bathtubs, and outdoor spigots, to allow air into the pipes and facilitate drainage.
Additionally, flushing the toilets will help to remove any water left in the tanks and bowls. If the home has a water heater, it should also be drained according to the manufacturer’s instructions. Collecting the water in appropriate containers ensures that the area remains clean and free from spills, making the repiping process smoother and more efficient.
Removing old pipes and fixtures
Removing old pipes and fixtures is a crucial step in the repiping process. Before any removal begins, it’s essential to turn off the water supply to the home to prevent flooding and water damage. Once the water is off, the next step is to drain the system, ensuring that no water remains in the pipes. This is typically done by opening faucets and flushing toilets.
After draining, the process can begin with the removal of fixtures such as sinks, toilets, and bathtubs. These are often secured with screws or bolts, so proper tools are needed to carefully detach them without damaging surrounding areas. Next, the old pipes, which may be made of materials like copper, PVC, or galvanized steel, need to be removed. Cutting through the pipes may be necessary, especially in tight spaces. Care must be taken to remove any pipe fittings and hangers that are no longer needed, as this will prepare the area for the new piping system.
Once all old materials are removed, the space should be cleaned and inspected for any potential issues such as corrosion or mold.
Installing new plumbing pipes and fixtures
Installing new plumbing pipes and fixtures is a critical step in the repiping process, ensuring that your home’s plumbing system is updated and efficient. The process begins with assessing the current plumbing layout and identifying the areas that require new pipes.
Once the plan is established, the next step is to purchase the necessary materials, which may include copper, PEX, or PVC pipes, as well as fittings, valves, and fixtures such as faucets and showerheads.
After gathering materials, the old pipes must be removed carefully to avoid damaging surrounding structures. This is followed by the installation of new pipes, which involves cutting the pipes to the correct lengths and connecting them securely.
Proper sealing and insulation of the pipes are essential to prevent leaks and to maintain efficiency. Finally, fixtures are installed, and the entire system is tested for leaks and functionality. This thorough approach ensures a reliable plumbing system that meets modern standards and provides peace of mind for homeowners.
Conducting inspections and testing the new system for leaks
Once the repiping process is complete, conducting thorough inspections and testing the new system for leaks is essential to ensure everything is functioning correctly. Begin by examining all visible joints and connections for any signs of moisture or water pooling. It is advisable to visually inspect areas underneath sinks, behind walls, and around any access points. After the visual inspection, the next step involves pressurizing the system using air or water. This helps to identify any leaks that may not be visible to the naked eye. During this test, a pressure gauge is used to monitor the system’s integrity; if the pressure drops, it indicates a potential leak that must be located and addressed.
Following these tests, it is crucial to run water through the new pipes for an extended period, checking for leaks at each fixture. This not only confirms the system is leak-free but also ensures that water flows correctly throughout the house. Document all findings during inspections and tests to provide a record of the system’s condition and any necessary repairs that may need to be made in the future.
Finalizing the installation and restoring the water supply
After the new piping has been installed, the next crucial step is finalizing the installation and restoring the water supply. This process typically begins with a thorough inspection of the newly laid pipes to ensure that all joints and connections are secure. It’s essential to check for any leaks that could disrupt the water flow or damage the property.
Once the inspection is complete and any necessary adjustments have been made, the water supply can be gradually restored. This involves turning on the main water supply slowly to allow the system to pressurize and any remaining air to escape. Homeowners should monitor the water flow closely during this phase, watching for any signs of leaks or irregularities.
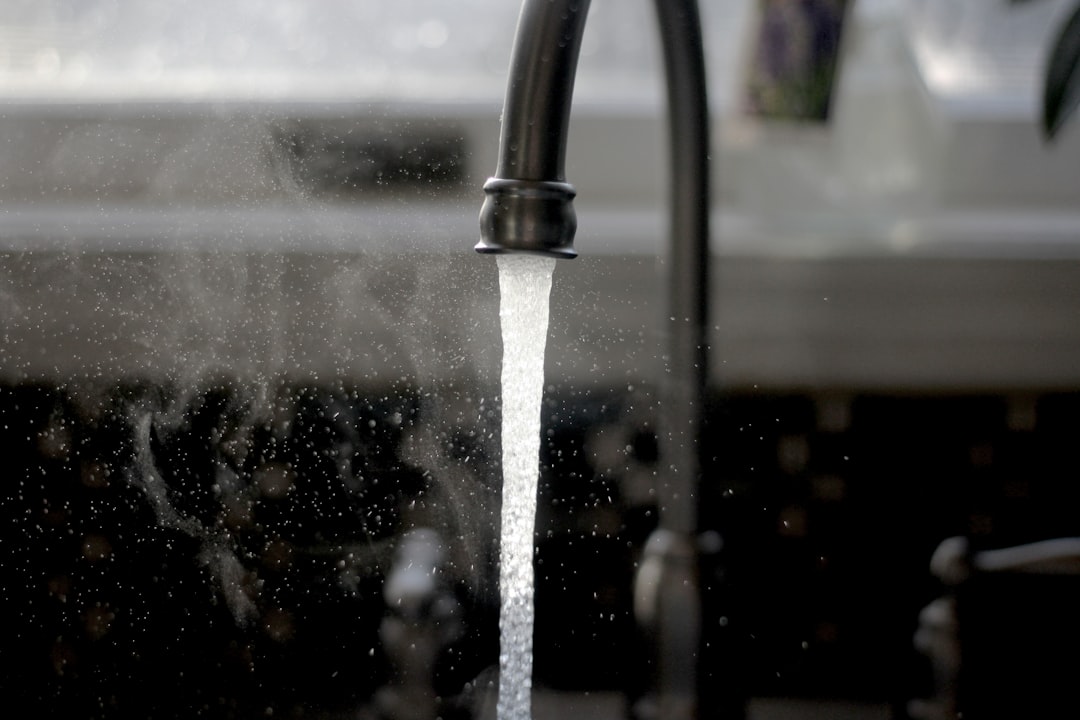
After confirming that everything is functioning properly, it is wise to run the taps for several minutes to clear out any debris or particles that may have entered the new system during installation. Finally, testing all faucets and fixtures for proper operation helps ensure that the repiping has been successful and that the household can enjoy a reliable water supply once again.
Conclusion
Repiping your home is a significant investment that can greatly enhance the efficiency and reliability of your plumbing system. By following the detailed steps outlined in this guide, you can navigate the repiping process with confidence, ensuring that your home enjoys clean, dependable water supply for years to come. From assessing your current plumbing to installing new materials and conducting thorough inspections, each stage is essential for a successful outcome. Remember, whether you’re dealing with outdated piping materials or persistent plumbing issues, you’re not alone in this journey. If you’re ready to take the next step in safeguarding your home, don’t hesitate to reach out for professional assistance. Call 573-555-2121 today to speak with an experienced plumber who can provide the support and expertise you need. Invest in your home’s plumbing—the benefits will be well worth it.