Table of Contents
- Introduction
- Identifying the source of the leak
- Gathering necessary tools and materials
- Shutting off the water supply
- Disassembling the faucet components
- Replacing worn washers or O-rings
- Reassembling the faucet
- Restoring the water supply and checking for leaks
- Providing maintenance tips to prevent future leaks
- Conclusion
- Frequently Asked Questions
Introduction
Have you ever experienced the annoying drip of a leaky faucet? It’s a small issue that can quickly escalate into a bigger problem if left unresolved.
In this article, we dive into the fascinating world of plumbing to unveil the artistry behind fixing that persistent leak. Plumbers are not just technicians; they are craftsmen who possess a unique blend of skills, knowledge, and an uncanny ability to diagnose problems that can stump even the most seasoned DIY enthusiasts.
As we explore the systematic approach plumbers use to tackle a leaky faucet, you’ll discover the tools they employ, the common pitfalls they avoid, and the secrets that transform a simple repair task into a gratifying victory. Join us on this journey to uncover the inner workings of plumbing and the mastery involved in restoring peace to your home.
Prepare to be inspired by the methods that lay behind every drip and drop and learn why trusting a professional is the key to a long-lasting solution.

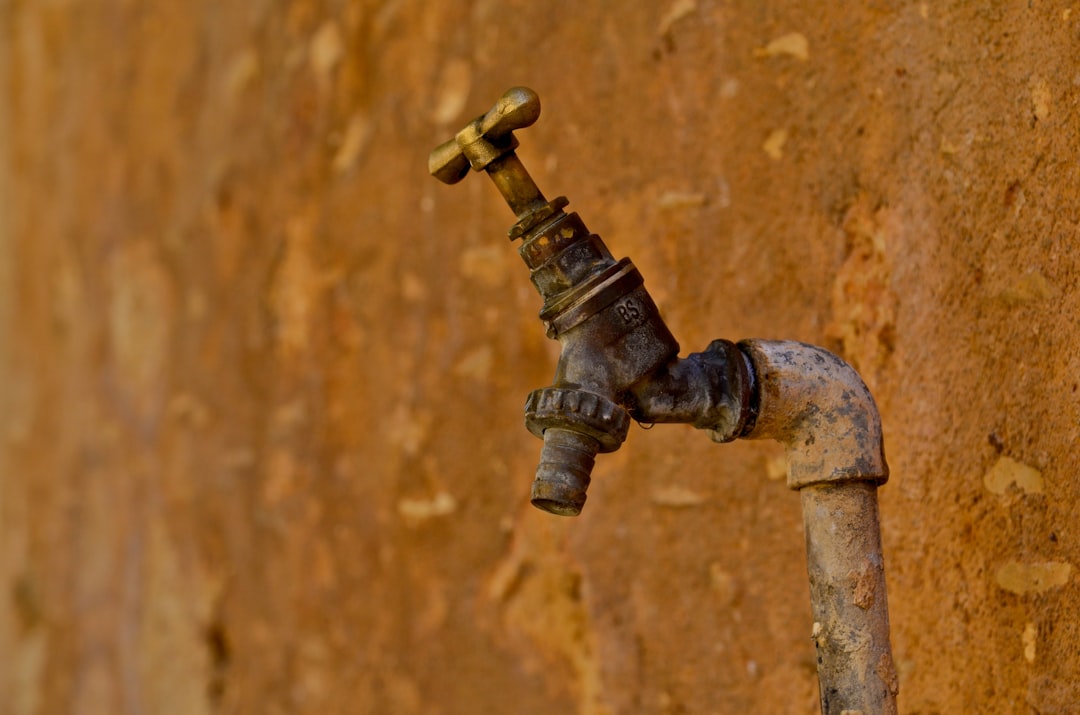
Identifying the source of the leak
Identifying the source of a leaky faucet is the first step in the repair process. The leak could originate from various components, making careful examination essential. Start by checking the faucet handle. Water may drip from the handle when it is turned on or off, indicating a worn-out O-ring or a loose packing nut. Next, observe the spout; water pooling around the base may suggest that the cartridge is damaged or that seals have deteriorated.
Another area to assess is the supply lines under the sink. Leaks in these lines can produce water accumulation beneath the faucet, mimicking a faucet leak. Inspecting the connections for any signs of moisture is crucial.
Additionally, be mindful of the faucet type. Compression faucets often leak due to worn washers, while cartridge faucets can have issues with the cartridge itself. Knowing how to identify these various sources of leaks helps to streamline the repair process, making it easier for the plumber to address the problem effectively.
Gathering necessary tools and materials
Before attempting to fix a leaky faucet, it is essential to gather all necessary tools and materials. This preparation not only saves time but also ensures that the repair process goes smoothly. Start by collecting a pair of adjustable wrenches, which will help in loosening and tightening the various nuts and bolts. A flathead and Phillips screwdriver are also vital for removing any covers or components of the faucet.
Besides these tools, you will need a replacement cartridge or washer, depending on the type of faucet you are working with. Consult the manufacturer’s instructions to determine the correct part. It is also beneficial to have plumber’s tape on hand, which can be used to create a watertight seal on threads.
Lastly, keep a towel or rag nearby to wipe up any excess water during the repair. By assembling these tools and materials ahead of time, you can make the faucet repair process more efficient and effective.
Shutting off the water supply
When dealing with a leaky faucet, the first crucial step is shutting off the water supply. This process is essential to prevent further water damage and make the repair more manageable. Generally, there are two main options for shutting off the water: turning off the individual faucet supply valve or the main water supply for the entire home.
Typically, individual supply valves are located underneath the sink. Look for two valves—one for hot water and one for cold. Simply turn them clockwise to shut off the flow. If the valves are stuck or you cannot find them, you may need to shut off the main water supply. This is usually found near the water meter, in the basement, or outside the house.
Once the water supply is off, it’s advisable to open the faucet to relieve any remaining pressure in the lines. This will allow the plumber to work more effectively without concerns about residual water. Additionally, placing a bucket or towel under the faucet can help catch any spills that may occur during the repair process.
Disassembling the faucet components
Disassembling a leaky faucet involves several key steps that allow plumbers to identify and fix the source of the leak. First, it’s essential to turn off the water supply to prevent additional leakage during the process. Once the water is off, the plumber removes any decorative caps on the handle, exposing the screws underneath. Using a screwdriver, the screws are taken out, allowing for the removal of the faucet handle.
Next, the plumber may need to detach the retaining nut, which holds the inner components secure. A basin wrench is often used for this step, especially in tight spaces. After removing the retaining nut, the stem or cartridge can be pulled out carefully. At this point, the plumber inspects all components, including seals and O-rings, for wear or damage.
Should any parts appear faulty, they are replaced with new ones to restore the faucet’s function. Finally, the faucet is reassembled in the reverse order of disassembly, ensuring everything is tight and secure to prevent future leaks.
Replacing worn washers or O-rings
Replacing worn washers or O-rings is a common step in fixing a leaky faucet. Over time, these components can deteriorate due to constant use and exposure to water, leading to leaks. To begin the process, the water supply must be turned off to prevent any further dripping. Once the water is off, the faucet handle is removed, which often requires unscrewing a screw located under a decorative cap or on the handle itself.
After removing the handle, the retaining nut must be unscrewed to access the internal components. The worn washer or O-ring can then be carefully taken out. It’s essential to note the size and type of the old washer or O-ring to ensure a proper replacement. Generally, these can be found at local hardware stores. After securing the new washer or O-ring in place, the faucet reassembly begins in reverse order. Tightening all components properly is vital to prevent any future leaks.
This straightforward task can restore the faucet’s functionality, saving both water and reducing the utility bill.
Reassembling the faucet
Once all the components of the faucet have been cleaned and inspected, the next step is reassembling the faucet. Begin by placing the new washer or O-ring onto the cartridge or stem, ensuring it fits snugly. This part is crucial as it helps create a watertight seal. Next, carefully insert the cartridge or stem back into the faucet body. Be mindful of the alignment marks, which indicate the proper orientation for reassembly.
After positioning the cartridge, reattach any retaining nuts or screws that hold it in place. Use the appropriate tools to tighten these components, but avoid overtightening as this may cause damage. If your faucet has a decorative handle, reinstall it by following the manufacturer’s instructions, ensuring any locking screws are securely fastened.
Finally, turn on the water supply to the faucet and check for leaks. If everything is properly sealed, the faucet should operate smoothly. It’s advisable to check again after a few hours of use to ensure no leaks have developed.
Restoring the water supply and checking for leaks
After completing the repairs on a leaky faucet, the next crucial step for plumbers is restoring the water supply. This typically involves turning the water supply valve back on, which is commonly located under the sink. Plumbers ensure the valve is opened slowly to prevent any sudden pressure surges that could cause further issues.
Once the water supply is restored, the plumber checks for leaks. This is done by closely inspecting the area around the faucet and connections. They may turn the faucet on and off several times to monitor for any dripping or water accumulation. If leaks are detected, the plumber may need to tighten fittings, replace washers, or adjust seals to ensure everything is secure. Sometimes, a plumber may use a tissue or paper towel to help visualize any leaks by placing it around connections. This careful monitoring is essential to ensure that the repair is successful and that no further water damage occurs. Finally, after confirming there are no leaks, the plumbing system is tested in its entirety to guarantee optimal functionality.
Providing maintenance tips to prevent future leaks
Regular maintenance of your plumbing fixtures is essential to prevent future leaks, particularly in faucets. One effective tip is to periodically check for signs of wear and tear. Look closely at the faucet handle and spout for any signs of rust or corrosion.
Additionally, ensure that the washers and O-rings are in good condition. These components can degrade over time, leading to leaks. Replacing them every few years can extend the life of your faucet.
Another preventive measure is to clean the aerator regularly. Over time, mineral buildup can impede water flow and cause pressure, eventually leading to leaks. Simply unscrew the aerator and rinse it under water or soak it in vinegar to remove buildup.
It’s also advisable to keep an eye on your water pressure. High water pressure can put a strain on your plumbing system, leading to leaks. Consider installing a pressure regulator if your water pressure exceeds recommended levels.
With these simple maintenance tips, you can help ensure the longevity and functionality of your faucets, minimizing the risk of leaks in the future.
Conclusion
In conclusion, mastering the art of fixing a leaky faucet involves a series of systematic steps that any plumber can efficiently perform. From identifying the source of the leak to replacing worn components and reassembling the faucet, each process plays a vital role in ensuring a long-lasting repair. Regular maintenance practices, such as checking for wear and cleaning aerators, can significantly extend the life of your faucets and prevent future leaks. If you find yourself facing persistent plumbing issues, don’t hesitate to seek help. Call 573-555-2121 for expert plumbing assistance today and ensure your home remains leak-free and functional!