Table of Contents
- Introduction
- Plumbing pipe replacement procedures
- Plumbing fixture installation best practices
- Steps for plumbing valve repair
- How to handle plumbing emergencies
- Techniques for plumbing drain cleaning
- Guidelines for plumbing water heater service
- Methods of plumbing leak detection
- Importance of plumbing backflow prevention
- Conclusion
- Frequently Asked Questions
Introduction
Have you ever found yourself staring at a pesky leak, wondering how to fix it without calling in a professional? You’re not alone! Leaks are one of the most common household problems, and mastering the art of plumbing can save you stress, time, and money. In this article, we will guide you through the essential steps to tackle any leak like a pro.
Whether it’s a dripping faucet, a running toilet, or a hidden pipe that’s springing a surprise, we’ve got you covered. No need for previous experience—just a willingness to learn and the right tools at your side.
Imagine the pride of fixing your plumbing issues without the cost of a costly contractor. Armed with tips, tricks, and strategies from seasoned plumbers, you’ll gain the confidence to handle leaks and more.
So, roll up your sleeves and get ready to dive into the world of plumbing mastery! Discover that the solution to your leak is just a read away.

Plumbing pipe replacement procedures
Replacing plumbing pipes can be a straightforward task if approached methodically. First, ensure you have the necessary tools and materials, including a pipe cutter, wrenches, and replacement pipes. Begin by turning off the water supply to avoid any leaks or flooding. Next, drain the existing pipes by opening faucets and allowing water to flow out. It is essential to assess the type and location of the pipes you need to replace, whether they are made of PVC, copper, or another material.
Once you have identified the problematic section, use a pipe cutter to remove the damaged pipes carefully. Be sure to cut the pipes straight to ensure a proper fit when installing the new ones. After removing the old pipe, measure and cut the replacement pipe to size, adding connectors as necessary. Finally, secure the new pipe in place and turn the water supply back on to check for leaks. Ensuring all connections are tight and secure will help prevent future issues.
Plumbing fixture installation best practices
Installing plumbing fixtures requires attention to detail and adherence to best practices to ensure functionality and longevity. Start by gathering all necessary tools, including wrenches, screwdrivers, and sealants. Before installation, turn off the water supply to prevent leaks.
When positioning the fixture, ensure that it is level and aligned properly. This helps prevent any unnecessary strain on the plumbing connections. For faucets and sinks, apply plumber’s tape to threaded connections to create a watertight seal.
When connecting water lines, use the correct fittings and ensure they are tightened securely but not excessively, which could damage the fittings. Test the connections by turning on the water supply gradually and looking for leaks.
After installation, take the time to properly clean the area and dispose of any debris. It’s also advisable to check the manufacturer’s instructions for specific guidelines related to the fixture being installed, as different products may have unique requirements. Following these best practices will lead to a more successful and efficient installation process.
Steps for plumbing valve repair
Repairing a plumbing valve can seem daunting, but following these steps can make the process manageable.
First, turn off the water supply to the valve you intend to repair. This is crucial to prevent any leaks or flooding during the repair process.
Next, ensure you have the right tools: a wrench, screwdrivers, and replacement parts specific to your valve type.
After securing your tools, remove the valve handle by unscrewing it to access the inner components.
Inspect the valve for any visible signs of damage or wear, such as corrosion or mineral buildup.
If necessary, replace any damaged parts, including washers or O-rings, which are common culprits for leaks.
Once the repairs are made, reassemble the valve by carefully putting the handle back in place.
Finally, restore the water supply and check for any leaks. Tightening connections may be necessary to ensure everything is securely fastened.
By following these steps, you can effectively repair a plumbing valve and maintain your plumbing system.
How to handle plumbing emergencies
Plumbing emergencies can arise unexpectedly, causing stress and potential damage to your home. The first step in handling a plumbing emergency is to remain calm and assess the situation. Identify the source of the problem, whether it’s a burst pipe, overflowing toilet, or a blocked drain.
Once the issue is identified, shut off the water supply to prevent further damage. For most fixtures, there is a specific valve; for major issues, locate the main water shut-off valve for your home.
Next, contain the situation by using towels, buckets, or any available container to catch leaks or spills. If the problem is beyond your ability to fix, contacting a professional plumber immediately is advisable.
Also, document the situation by taking photos to show the plumber later, which can help in assessing the damage and providing a more accurate estimate.
Finally, after the emergency has been addressed, consider preventive maintenance to avoid future issues, such as regular inspections and prompt repairs of minor leaks.
Techniques for plumbing drain cleaning
Keeping your drains clean is essential for preventing clogs and maintaining a smoothly functioning plumbing system. One effective technique for plumbing drain cleaning is the use of a plunger, which creates pressure to dislodge blockages. For tougher clogs, employing a drain snake can be beneficial; this tool consists of a long, flexible auger that can reach deep into pipes to remove stubborn debris.
Another useful method is the application of a mixture of baking soda and vinegar. The chemical reaction between these substances bubbles and can help break down grease and grime buildup. After allowing it to sit for a while, flush the drain with hot water for an extra cleanse.
Additionally, using hot water alone can help clear minor obstructions and dissolve organic materials. Regular maintenance, such as using a drain strainer to catch debris and periodic cleaning with natural solutions, can prevent major issues. Understanding and applying these plumbing techniques can help keep your drain systems functioning effectively.
Guidelines for plumbing water heater service
Proper maintenance of a water heater is essential for ensuring its efficiency and longevity. First, turn off the power supply to the water heater, whether it is gas or electric. Next, check the temperature and pressure relief valve; this is a crucial safety feature that prevents excess pressure buildup. Test it by lifting the lever and ensuring water flows out, then allow it to close completely.
Flushing the tank is also vital. Over time, sediment can accumulate, reducing efficiency and causing damage. Attach a hose to the drain valve at the bottom of the tank and let the water drain out, ensuring that sediment is removed. After flushing, refill the tank and restore power. Additionally, inspect the anode rod every few years. This rod helps prevent rusting inside the tank and should be replaced if it is corroded. Regular inspection and maintenance can help identify potential issues early and save on costly repairs or replacements.
Methods of plumbing leak detection
Detecting plumbing leaks is crucial for maintaining the integrity of any water system. Various methods can be employed to identify these leaks effectively.
One common approach is the visual inspection, where plumbers check for moisture, mold, or discoloration around pipes and fixtures. This method can often reveal obvious issues but may miss hidden leaks.
Another method is pressure testing, which involves temporarily sealing the plumbing system and monitoring the pressure levels. A significant drop in pressure indicates a leak.
Acoustic leak detection is also widely used, utilizing specialized equipment to listen for the sounds of water escaping from pipes. This method is particularly effective for underground leaks.
Thermal imaging cameras can be employed as well, detecting temperature variations in walls, floors, and ceilings, thus revealing the presence of moisture.
Finally, electronic leak detection involves using electronic sensors to locate leaks by measuring humidity and moisture levels in specific areas. Each of these methods offers unique advantages and can be tailored to the specific plumbing situation.
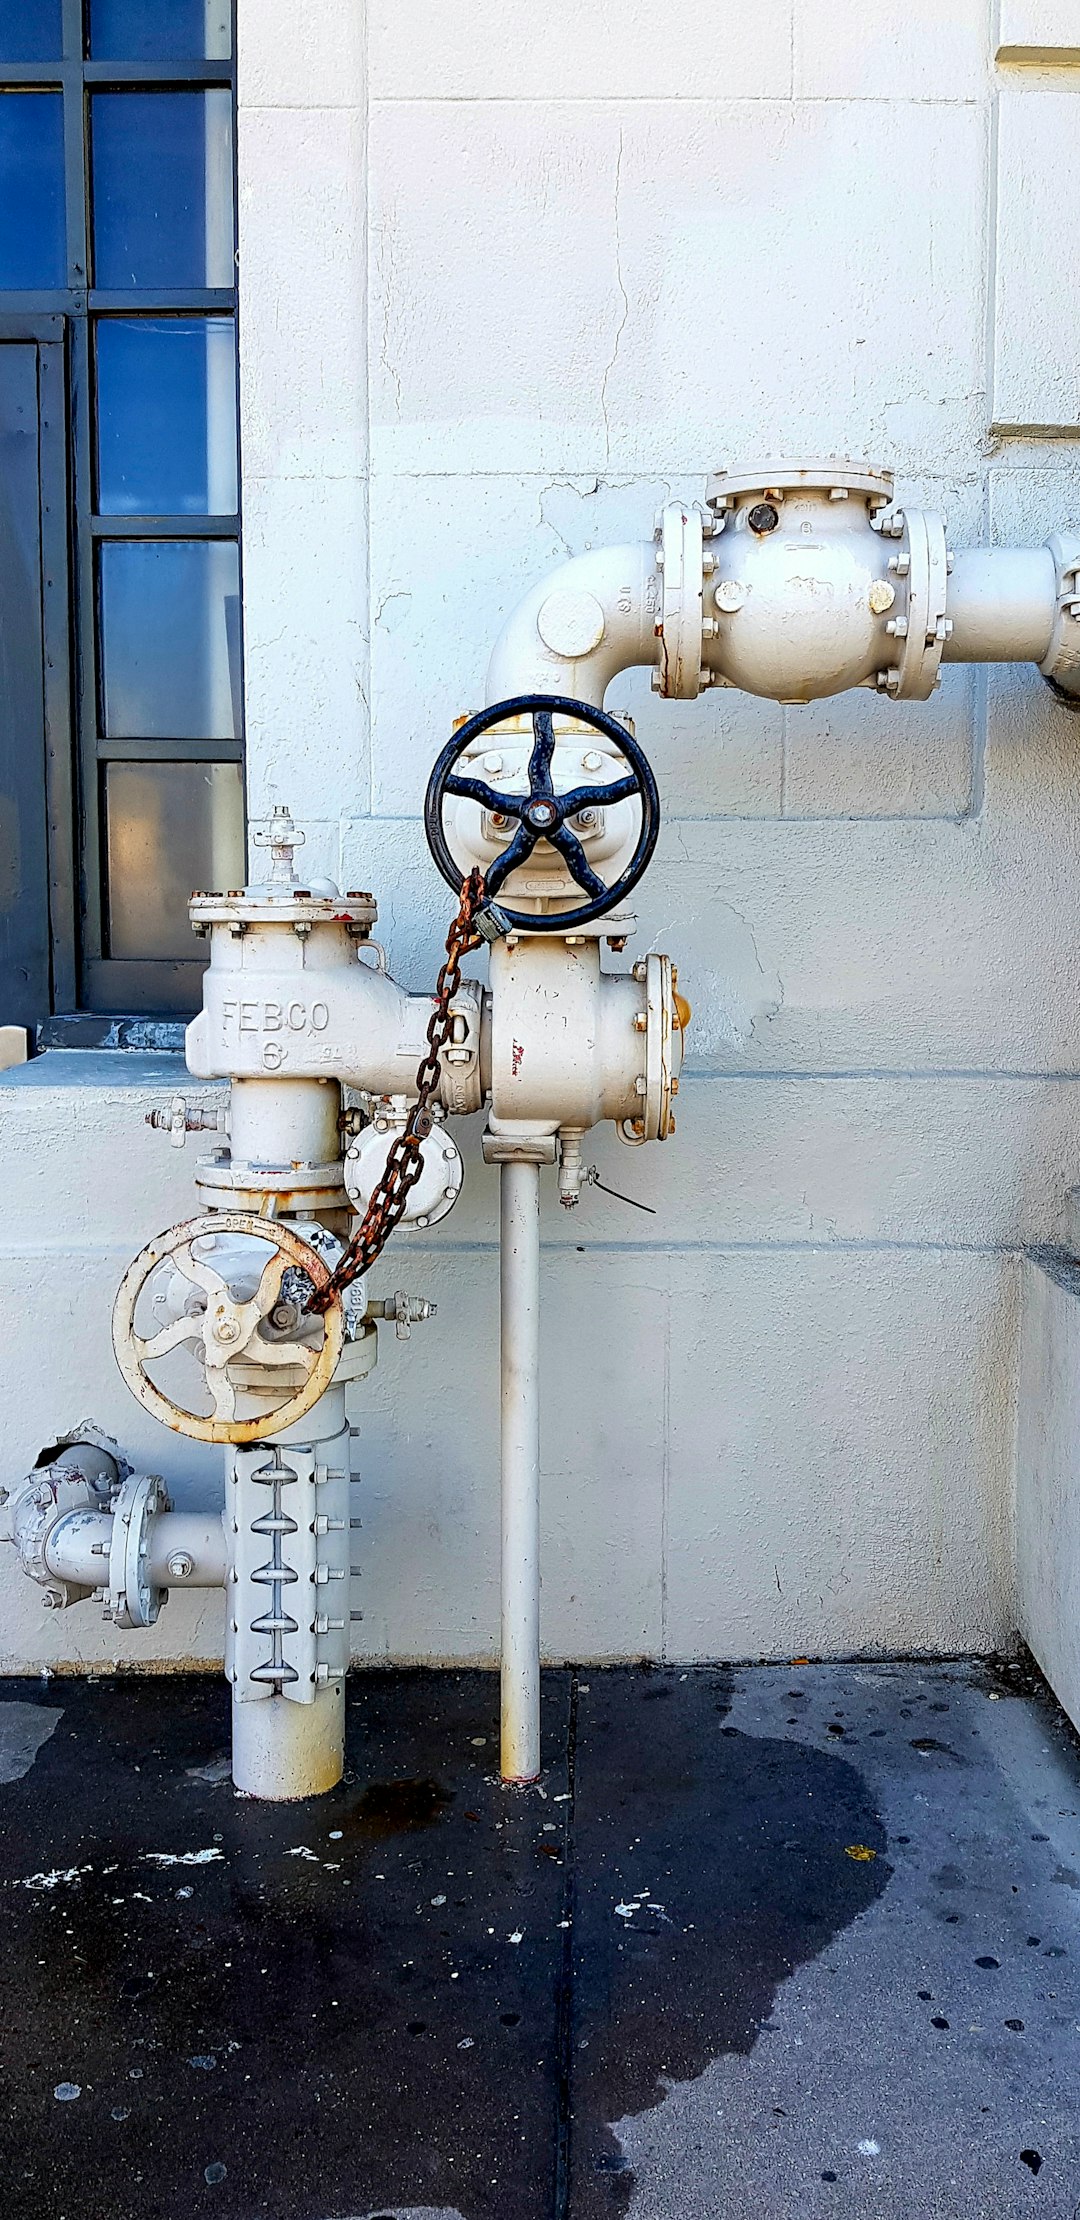
Importance of plumbing backflow prevention
The importance of plumbing backflow prevention cannot be overstated, as it plays a crucial role in maintaining the safety and quality of our water supply. Backflow occurs when water flows in the opposite direction, potentially allowing contaminants to enter clean water systems. This can happen due to various reasons, such as changes in water pressure or a sudden drop in supply.
Implementing backflow prevention devices is essential for safeguarding public health, as it prevents harmful substances—from chemicals to biological contaminants—from infiltrating drinking water. This is particularly important in residential areas, commercial establishments, and industrial sites where a high risk of contamination exists.
Moreover, backflow preventers are often required by local regulations and building codes, ensuring compliance and promoting responsible plumbing practices. Regular testing and maintenance of these devices are necessary to ensure they function properly and provide the intended protection. Overall, investing in proper backflow prevention is a vital step for homeowners and businesses alike in preserving water safety and avoiding costly contamination issues.
Conclusion
In conclusion, mastering plumbing and tackling any leak like a pro is not just about handy skills but also about understanding best practices and preventive measures. From replacing pipes to detecting leaks, each step plays a crucial role in maintaining your plumbing system effectively. Whether you are handling a minor leak or facing an emergency, knowing the right procedures and techniques can save you time and money in the long run. Remember, regular maintenance and quick action during emergencies are key to preventing larger issues in the future. If navigating plumbing challenges feels overwhelming, don’t hesitate to seek professional help. Call 573-555-2121 today for expert plumbing assistance and ensure your plumbing systems remain in top shape!